Monday, October 10, 2011

Hiking in the Appalachians Part One


Sunday was a beautiful day with sunny skies and a temperature hovering around 80, not bad for the mountains this time of year. After a late breakfast at Cracker Barrel with a colleague, I headed off for Valley Falls State Park again. This time, though, I didn't go down to the river. Instead, I headed up a mountain away from the river. On a poorly maintained trail circling the mountain and inclining most of the way, I quickly gained altitude, although did not get a good overhead view of the river due to the trees.

The trail branched many times as I made my way higher, and I kept taking the left branch until I meandered into a creek that feeds into the river. Much like the river, the creek was a series of waterfalls coming down the mountain, including one rather tall and scenic twin waterfall with a large pool beneath. I put down my backpack and carefully worked my way out into the middle of the creek teetering precariously on a very slippery, mossy stone to take photos of the falls. Then, having retrieved my bag, I inched my way across a downed tree trunk to the other side of the creek to check out some old brick ruins that were situated along the bank.

Making my way back to another branch, I continued along the creek for some ways, admiring the rhododendron trees that flanked both banks. At one point, the trail crossed the creek at a shallow ford, although there were stone pylons of what once was a bridge beside it. My thinking is that the trail I was on had been a road at one point many years ago. In the end, I hiked seven miles around the mountain, half of it up and half down. It took me about two hours, including the time I spent at the creek taking pictures. When I returned to my car, I was tired and sore, but already planning my next trip to explore the other trail branches, especially the one marked Rocky Trail that led straight up the mountain side to the top rather than gradually inclining around the mountain.
The trees are changing colors. The drive through the mountains to the park was spectacularly scenic.
The tallest falls of the creek, taken from a slippery rock in the middle of the creek.
The first view of the creek I had from the trail. I knelt on some rocks and dipped my hand in the water. It wasn't as cold as I thought it would be.
That is the tree I used to cross over to the other side of the creek. It isn't very big of a tree and before I made it all the way across, my weight began to break the branches.
This is the most unusual of the brick ruins near the creek. It is a circular foundation made of bricks. It was half full of water and had a dead beaver floating in it.
One of the stone pylons of the bridge that once was. Everything was covered in moss. The trees weren't very close to each other, but their canopies blocked out most of the sunlight, so there was very little underbrush. I could have hiked just about anywhere.
An ugly mug in a beautiful place.

Sunday, September 25, 2011

Don't Fall off the Rocks in the Valley

Howdy folks! It's been a long while again since I last updated, but this seems to be the easiest way to share my photos and experiences with my family, so when I see something neat on my travels, I'll post about it here.

I relocated to West Virginia last weekend to take a new job. I don't actually live here, but I'm living out of a hotel here until the current assignment is finished, however long that may be. I'm working six days a week, which doesn't leave a lot of downtime for sight seeing, but I manage to check out some local sights on Sundays. Fortunately, the weather has been good both Sundays so far.

Today, I drove out to Valley Falls State Park, a smallish park that flanks the Tygart Valley River at an area of varying height which creates a series of waterfalls. The area along the river hasn't been developed, so I got to climb around on the boulders and rocks along the river to find interesting views from which to take photos. The falls cover a fairly long section, and generate a lot of rapids, as you can see in the photos. Swimming and wading was prohibited, but they do allow kayaking. The ruins of a stone grist mill that used to occupy a spot along the falls still remain. Next weekend, if the weather holds, I'll go back and hike some of the trails in the park. The views are amazing.

These stone pillars are the only remains of the old mill.
The water looked so inviting, it was hard not to jump in.
This was an interesting area - a pool formed by large boulders with five waterfalls feeding it.
I climbed down to rocks just barely above water level to take some of these photos. It was slippery, but worth it.
The roar of the water was deafening. Had a ranger been yelling at me to stay off the rocks, I never would have heard them. ;)
This was a really neat outcropping in the rocks. You can see from the standing water below it that the river at times covered the area I was standing.
Don't you just love waterfalls?
A view of many of the major falls from downriver. Lots of boulders worn smooth over the centuries.
Even downriver, the rapids were still wicked. This is what makes this such an awesome kayaking spot.
A lone boulder in the middle of the river creating rapids. Had I been able to get there, I would have had an awesome view of the entire system of falls and rapids.

The best part about this park was that while there were signs saying "stay out of the water", there weren't any saying you had to stay on the trails. Thus, I felt that this was an invitation to climb all over the rocks and boulders, and attempt scaling the rock walls farther from the river. Definitely on my list of places to go back to, especially since it is nearby and free - only took me about 15 minutes to get there on a road that wound through the mountains with straight up on one side and straight down on the other. I made sure to drive faster than was probably safe just for the thrill. :D


Saturday, January 15, 2011

Farm Fresh Chicken

With the Whiz Bang Chicken Plucker built and operational, it was time to start thinning the flock. Ultimately, we eliminated almost half our existing flock without decreasing overall winter egg production. Some of our oldest chickens, and thus the ones who laid the fewest eggs, were among the first to be captured.

These three hens have been tried and sentenced to death. They are awaiting execution in their shared cell. They know their time is short, and try to escape every time the executioner opens the cell door. However, only one successfully makes good on the attempt. The rest meet their fate and the executioner's axe.

Once beheaded, I hold the chickens over a bucket to collect the blood. Always good to drain them before moving on to the next step.

Here, you can see the entire set-up, including the chicken plucker off to the left side. Notice the guineas in the background serving as witnesses for the executions.

The deceased is submerged in water that has been heated to 150 degrees Fahrenheit for scalding, making the feathers much easier to remove. They are kept submerged for about forty-five seconds.

Then, into the chicken plucker they go, to spin at high speeds while the rubber fingers remove the softened feathers. Within thirty seconds, the chicken is naked and ready for butchering.

As you can see, the chicken plucker does an excellent job of removing the feathers. Just look at that chicken now.

Finally, dad dices and slices the chicken, removing the entrails, feet, and neck to leave us with a ready-to-cook whole chicken that we freeze. Since these chickens are nearing a year old, they are tougher than store bought chicken. Store bought chickens only reach their sixth week of life before they go through this process. Since we wanted the eggs, our chickens are older and tougher, therefore must be cooked either in a crock pot all day or put into soup.

Some of the hens still possess eggs that are in various stages of life. Most of our hens had approximately a dozen eggs in production. As you can see here, they are of varying sizes, from tiny little blips to fully formed eggs already shelled. This chicken would have laid an egg that day.

Whenever we butcher chickens, though, we end up with a bucket full of offal, unused chicken parts. Lovely, aren't they?

I've made a few of the chickens already. This was the first one, which I simmered in the crock pot for about ten hours with carrots, celery, and spices. It turned out quite well and wasn't tough at all. For better presentation, here it is on a plate.
Nice and tasty. Well, that is our chicken butchering process. Hopefully it didn't tax your digestive system too much and you were able to keep your dinner down. Until next time, stay green!

Friday, January 14, 2011

Whiz Bang Chicken Plucker

You've seen pics of the chickens scratching about in the yard in previous posts and I've mentioned the fresh eggs we receive daily. As the days grow shorter and the temperature colder, chickens lay fewer eggs. We went from an average of 15 eggs a day to two a day as summer turned to fall and fall to winter. Chickens also produce fewer eggs as they get older, with egg production dropping significantly after the first year. That means that we were feeding a flock of nearly 40 chickens every day and only receiving eggs from a few of them. They stopped being cost effective.

Thus, it was time to build a Whiz Bang Chicken Plucker. In case you've never heard of a Whiz Bang Chicken Plucker, here is a video clip of one in action.


Crazy isn't it? Definitely a redneck contraption, but also a very effective and efficient way to pluck a chicken in the shortest time possible. When you are butchering several dozen chickens, speedy plucking is a priority. I sat out the construction of the chicken plucker, but dad and a few friends spent two days building one.

First, they built the frame for the plucker out of a few 2x4s.

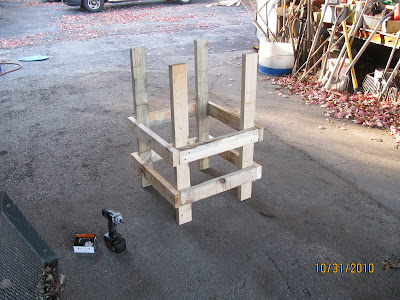
They had to drill holes in the industrial barrel and pull the rubber "fingers" through. Dad told me that this was the hardest part of the job as the holes had to be smaller than the fingers so that they would stay in place.

The bottom of the barrel was also covered with fingers, then attached to a circular piece of wood the same size of the barrel bottom. This would act as the moving component that would ensure the chickens would be plucked.

With the barrel in the frame, it was time to install the 3/4 hp electric motor and piece together the gears.

Completed, it looks much like the one in the video at top. We covered the motor with an old cat litter bucket so that it wouldn't get wet and screwed a cover on the switch to keep water out of the switch box too.

As this post is already quite long, I'll save the pics of the butchering and plucking process for the next post. Until then, stay green!

Tuesday, January 11, 2011

Picking Up Our Story...

When we last left off in August, dad and I were starting a three sided shed to store building materials. We had gotten the uprights in place and poured the footings, but I had not yet downloaded the pics before the folks took the camera with them to Texas.

Here you can see that we had begun nailing the siding supports and roofing beams in place.

The siding supports and roof beams are all in place. The ends were then sawed off so that the siding would be more or less flush.

If you look closely, you can see the siding we used. But first, we had to extract it from the overgrowth and clean it off.

There were years of mud and dirt caked on most sheets of the siding, but it was in excellent condition considering how many years it had been buried. In the background, you can see my grandfather, who helped dad and I extract the sheets.

Now we are faced with several weeks of work which were not documented photographically, as the camera stayed with my mom in Texas. So I'm afraid that the next pics jump to the finished product taken at the end of October.

The finished shed from the north east. Yes, the side panels do not meet up exactly, but we are getting better. At this point, I had already begun filling the building and stacking materials that wouldn't fit inside along the exterior walls. Sadly, that was the third time I had to move that stack of bricks.

And the view of the open side. When I started moving material into the shed, I didn't think the fencing would take up so much room, but it ended up taking about half the interior space. The fence posts thankfully took up much less room.

This project was important as it freed up the necessary room for another autumn project that you will see in a post before long. Until then, stay green!

A New Year

It has been quite some time since the last update, nearly five months. As many of you are probably aware of, my brother was severely injured in an accident at the end of August last year. He remained in a coma for about six weeks before being moved into a rehabilitation center. After a few weeks there, he progressed to a residential rehabilitation clinic for long term care. His progress has been remarkable, but he still has a long way to go. I have been down to Texas several times over the last five months to visit him while taking the final classes I needed for my teaching certification. Classes are finally over, but now I have begun student teaching, which will consume even more of my time.

However, despite all the turmoil since summer, we have managed to get a few projects completed on the "farm" that were either already in progress or needed doing before winter set in. Not everything was accomplished as we simply ran out of time, but I will add a few posts as to what we actually did. Happy new year everyone!