I bought two five gallon buckets with lids at Walmart yesterday, which will serve as the repository. We already had large sheets of 1-inch thick plywood that add additional strength to the toilet (Jenkins only calls for 3/4-inch plywood). To begin, you need at least two identical five gallon buckets with lids, a standard toilet seat, two hinges, enough screws to hold the toilet together, and 3/4 to 1 inch plywood. The buckets I used are 13 3/4 inches tall, so I needed the base of the toilet to be 12 1/4 inch tall. This allows the 1 inch thick hinged door to rest upon the base with 1/2 inches of the bucket remaining above the door.
 You need two 12 1/4 x 18 inch boards, two 12 1/4 x 19 1/2 inch boards, one 3 x 18 inch board, and the 18 x 18 inch door. Making the boards 12 1/4 inches eliminates the need for four additional boards to use as legs, although you can still use them if you want to variate the height of the finished toilet. I used a circular saw to cut the plywood into the appropriate sizes, but you can use a table saw or saber saw as well.
In the 18 x 18 inch door, turn your bucket upside down and trace around the lip. Make sure the bucket is about 1 1/2 inches from one side rather than centered on the board. Use a drill to make a starter hole within the circle, then a saber saw to slowly cut along your line. Use sandpaper or an electric sander or grinder to trim the hole once you are finished cutting to ensure that it easily and loosely fits over your bucket.

Once your boards have been cut, you'll have the supplies shown above (dog not included). Notice how the hole in the door is not centered. Now, it's time to assemble the pieces so that you can use your composting toilet.
 You'll probably need a second person helping to hold the boards in place while you drill in screws to secure them. The shorter 18 inch boards should be screwed into the edges of the longer 19 1/2 inch boards. Make sure your screws are long enough so that your toilet doesn't fall apart in the future while you're sitting on it. That wouldn't be good.
Once you've assembled the four sides, if your measurements were slightly off, just use your grinder or sander to take off the excess. You can also use it to slightly round the edges and remove any splinters.

The next step is to assemble the top. You are building a hinged top toilet for easy access to the bucket inside, but only a small portion of the top will be connected securely to the base. This is the 3-inch strip that you prepared earlier. Take your door and position it so that the hole is farthest from the 3-inch strip. It's always best to secure your hinges to the strip first as it will be the part attached to the base. Once you have them secure, go back and attach the hinges to your door.
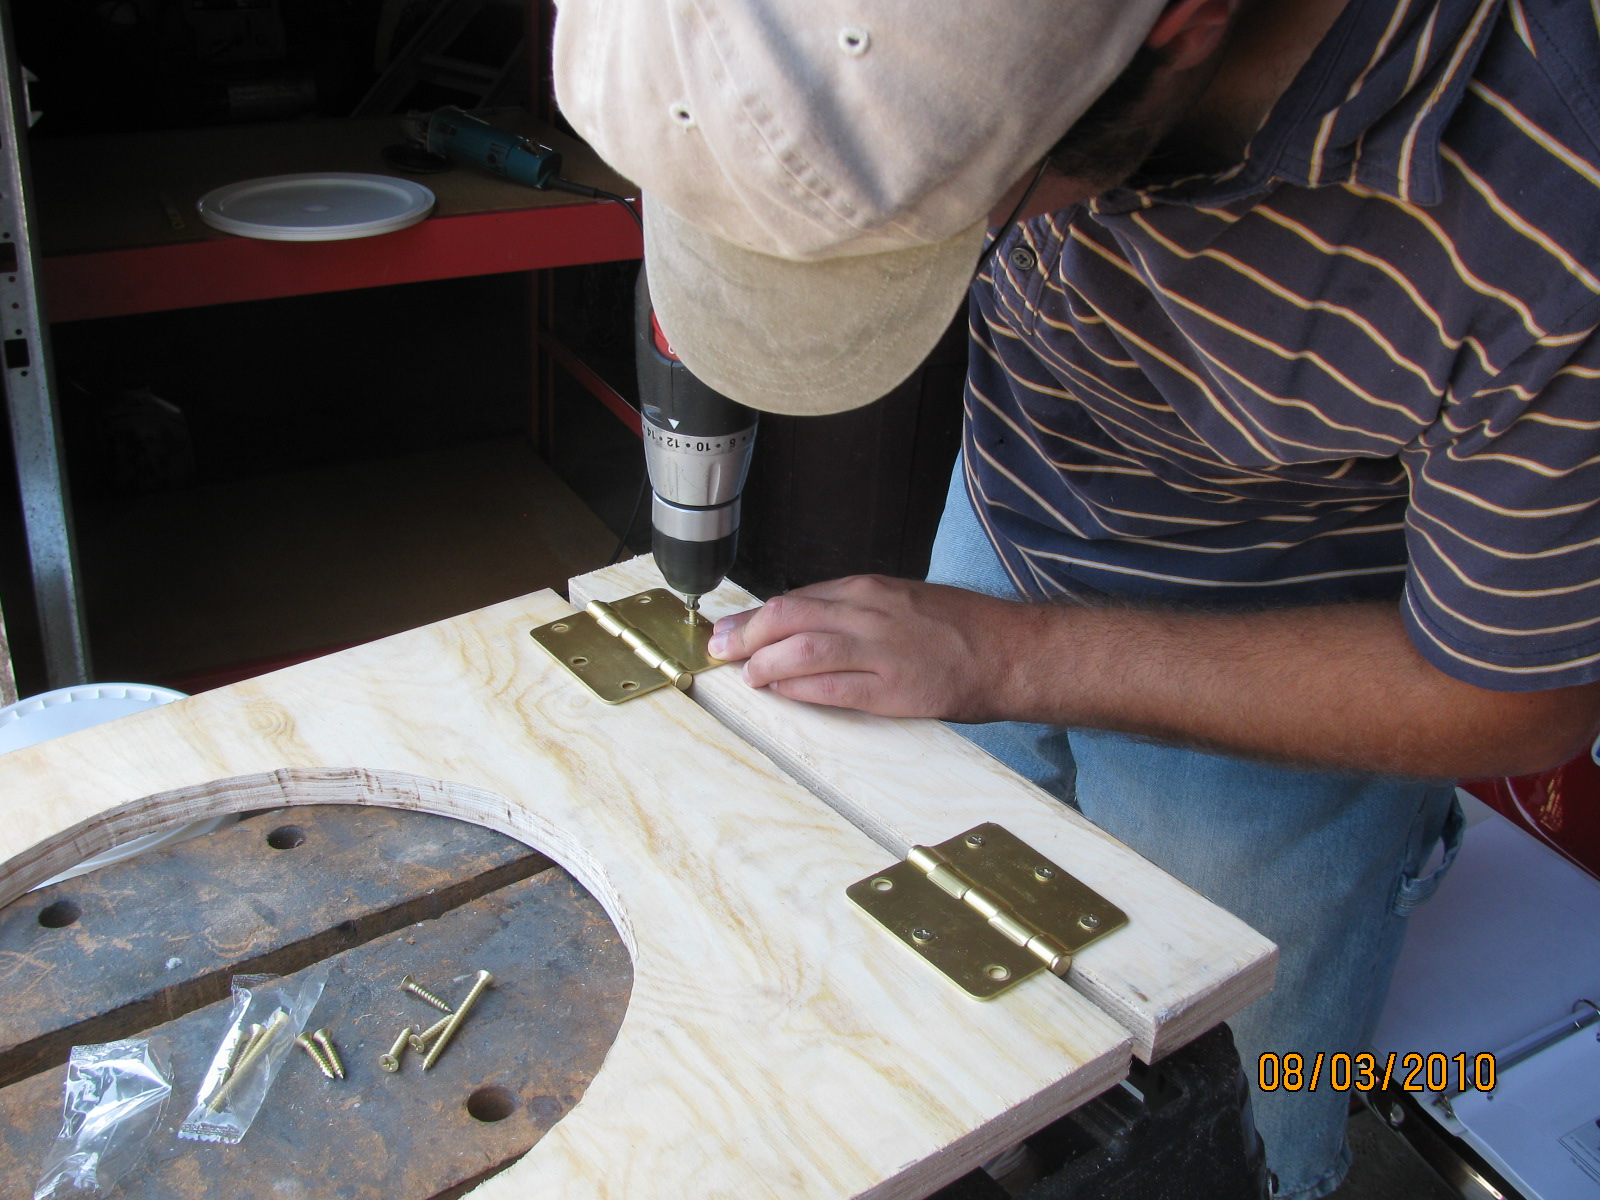
Now place your door on the base and line it and the strip up so that it is square. Definitely ensure that the strip is lined up correctly as you will need to secure it to the base. Use plenty of screws as this strip will get a lot of exercise whenever someone sits on the toilet or you lift the door to remove or replace the bucket.

Your base is now complete! Only thing left to do is securing the toilet seat. Place a bucket in the toilet as you normally would. 1/2 inches of it should clear the top of the door. Place the toilet seat on top, lining it up carefully so that the opening in the toilet seat matches the bucket's opening. Once lined up, you can either mark where to drill the holes for the bolts or drill through the fasteners into the door. I chose the latter simply because it was easier (I managed to drill through the fasteners without damaging the plastic). The bolts on most modern toilet seats are plastic, so make sure your holes are big enough around that you won't have to force the bolt.

Put the toilet seat back if you removed it, and put the bolts through the fasteners and holes. In order to screw on the nuts (also plastic), you'll probably have to lift the door, so you'll need a second set of hands again, in this case my cousin, Tim.

Once you have the nuts tightened and the toilet seat securely in place, you can paint or stain the toilet as you want to extend its life and make it more aesthetically pleasing. Search online for ideas, people do some really neat things with their composting toilets to blend them in with their surroundings or beautify them. For now, mine is staying this way until the humidity drops enough to paint it with shower paint, making it waterproof.

Don't forget to place a bucket full of an organic cover next to the toilet. You can use sawdust, peat moss, leaf mould, or even grass clippings. Simply start off with a layer of the organic cover material in the bottom of the bucket. After every use, completely cover the waste with another layer of cover material. The cover material prevents odors, absorbs excess moisture, and balances the carbon-nitrogen ratio. Always remember to cover after use, the toilet will not remain sanitary if you forget.
I don't have a designated compost area for the humanure yet, but will take pics once I build it. Don't mix your humanure with your other compost. Humanure takes longer before it can be safely used, especially in underdeveloped regions where pathogens are more common. For use in the US, common rule of thumb is to let it compost for a year before use. In underdeveloped regions, allow it two years before use. There is an entire chapter in Jenkins's Humanure Handbook that details composting. I suggest reading it before you empty your first bucket.
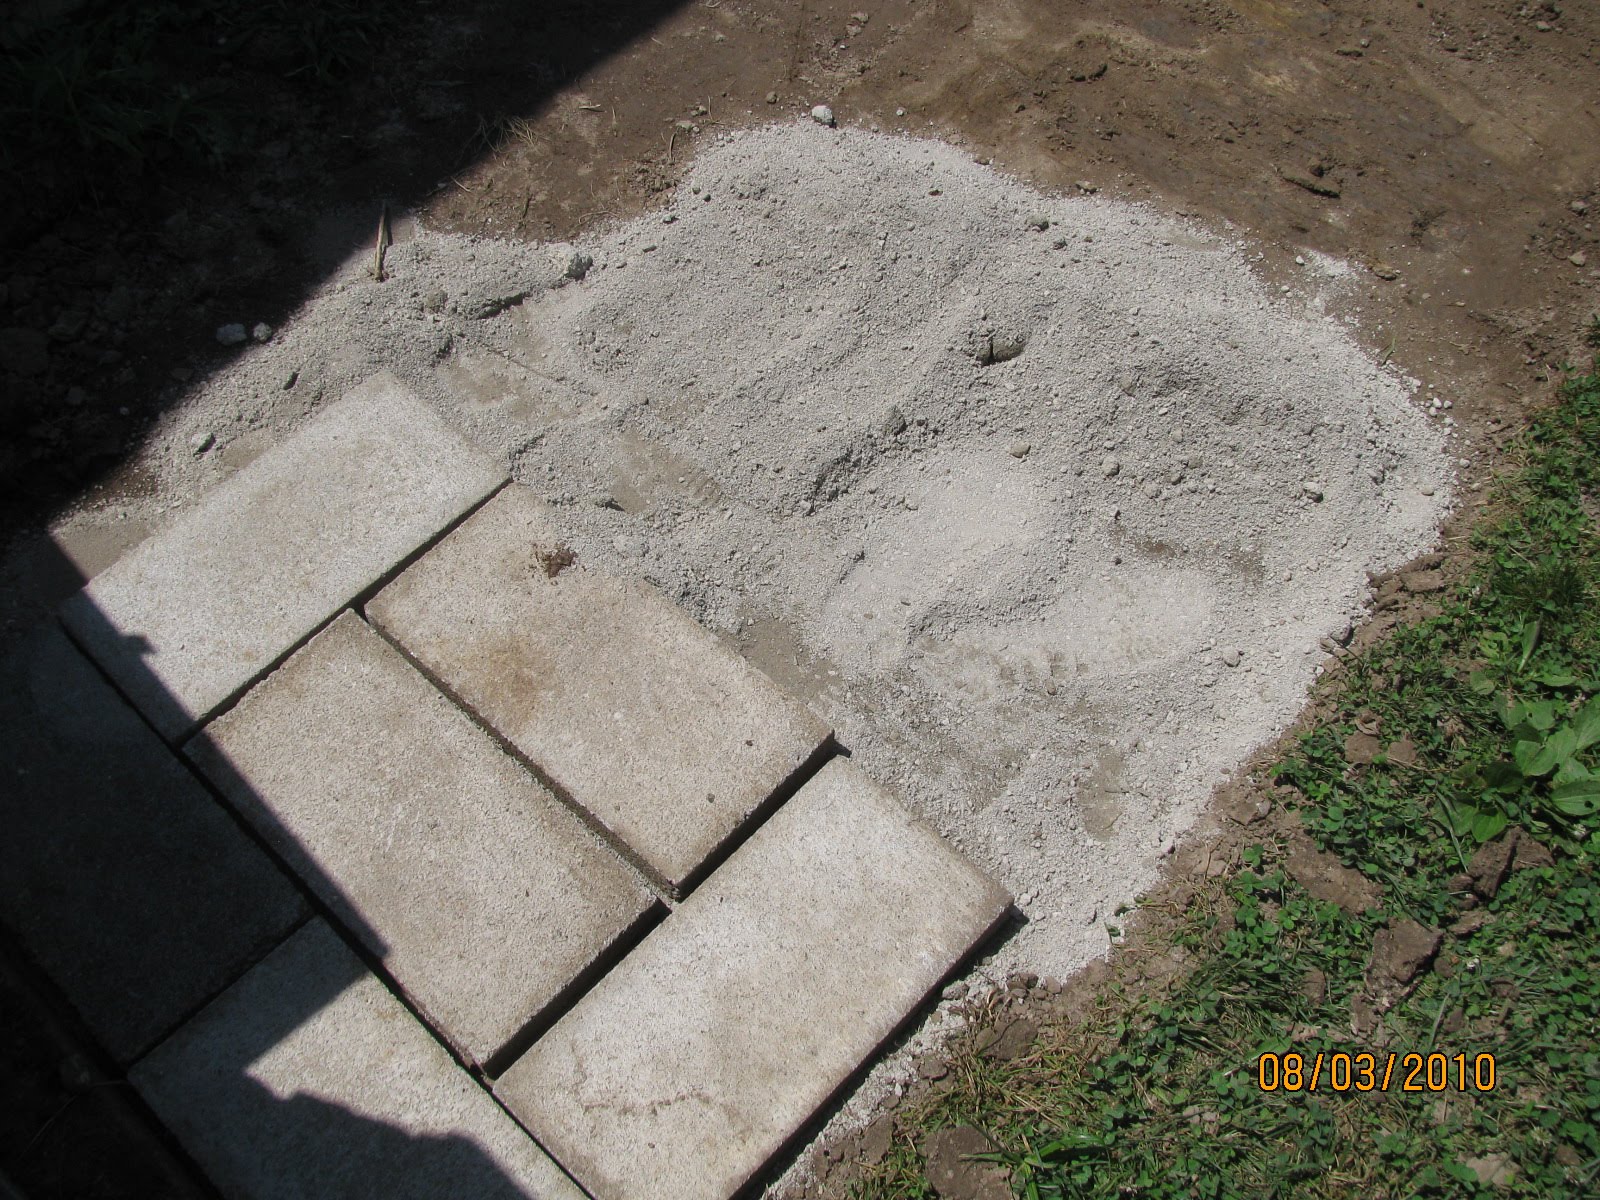
With the composting toilet done, I went to work on leveling the sidewalk area and pouring lime as a footing for the pavers. As you can see, I laid a few pavers down to see how it would do with the lime. There are a few areas I need to dig out deeper and a few areas that need to be raised still, but they look good in place.
I didn't get far before the heat just became too much to handle any longer. I finally stopped when the heat index hit 110 degrees and still rising. It's forecasted to hit 125 before the day ends. No way I can work out in the sun in that kind of heat. Tomorrow will be brutally hot too, but I'll get a few hours of work done in the morning while the sidewalk is in the shade of the building.

Stay green!
Interesting. Is it me, or does an outhouse come to mind when you see the boards under the toilet lid? Really though, living in an apartment, not sure how much I could duplicate your feat!
ReplyDeleteIt would be difficult in an apartment only because you wouldn't have a place to compost. It is doable if you have somewhere you can take the humanure, after all it is in a bucket with lid. You could put it in the trunk and drive it to a relative's place to compost there I suppose.
ReplyDelete