Monday, August 16, 2010

What to do with all that @#$%?

Well, I've managed to fill the bucket in the composting toilet for the first time, so needed a place to dump the humanure. I should have been prepared ahead of time, but with everything else going on, I just hadn't gotten around to it. Looking in The Humanure Handbook by Joseph Jenkins again, I reread the chapter on composting the humanure. I knew I needed to build a composting bin to ensure that the leachate wouldn't escape into the ground, so I went out this morning to build one.

I used four sheets of the 1-inch plywood the composting toilet was made from. Each measured 41.5-inches x 49.5 inches, so I decided to leave three of them at that size and cut the front wall from 49.5-inches down to 24-inches to be able to access the bin easier. I started by nailing the back and side walls together before nailing the shorter front wall onto the bin.

For strength, I took four pieces of a two-by-four and screwed them into the corners, securing both walls to each two-by-four. This will give the bin additional strength as the compost presses against the walls as the bin gets fuller. The screws will hold better than the nails. That's it, though. There really wasn't much to the construction of the bin, basically just a big wooden box with four walls and a dirt floor.


After the bin was finished, I needed coarse organic material to use on the compost pile. I decided to use grass clippings as I have almost 14-acres of grass that replenishes my supply every week. I used the bagger on the push mower long enough to fill our garden trailer twice. Before adding the humanure, you have to place an 18-inch thick base layer of the organic material in the bottom of the compost bin. This acts as a sponge to absorb the leachate. After the base layer is in place, you can empty the bucket of humanure directly onto the center of the pile. Cover the humanure with additional organic material until you cannot see or smell it.


The organic material doesn't have to be grass clippings. You can also use hay, stray, leaves, or weeds. Make sure that the top of the pile always remains fairly flat so that you can easily add another layer of humanure and cover material. You will not need to turn the pile regularly as with other composting methods, as long as you sufficiently cover the humanure after each deposit. If done properly, your pile will compost aerobically (at a higher heat) rather than anaerobically, meaning more rapid and complete destruction of any potential human pathogens.

If you have any questions about the composting toilet or compost bin, don't hesitate to send me an email at chad.stumph@gmail.com. I'm always happy to answer questions and reply to comments. Stay green!

A New Sign for the Shop

Over the last week, I've been up every morning shortly after 6am to work on the sidewalk project. The sod cutter didn't cut deep enough, so I'm having to use a maddox to finish the job. That means cutting another two to four inches deep down the entire length of the sidewalk. One more day and I should be finished with that phase of the project. We already have some lime down, which we will lay the pavers down on, but need a few more truckloads.


In anticipation of a large two-day auction across the road from us, I prepared a more permanent sign for our small country store that we operate on a part-time whenever-we-feel-like-it basis. I started with a 1-inch piece of scrap plywood left over from the composting toilet project. It was 11-inches x 30-inches. Using this as the base board, I took a seven-foot long two-by-four and made a 1-inch wide by 11-inches long cut in the middle using a Sabre saw and drill. I also used the circular saw to trim the bottom of the two-by-four into a point to make it easier to drive into the ground. I drove the base board through the cut in the two-by-four and viola, had a sign post.

Next, I cut four 5-inch x 20-inch boards from a sheet of 1/4-inch plywood. I used green spray paint as a base on all of the boards and the post. The next day, I used graph paper to make 2-inch x 4-inch stencils of the letters I would need. The missing sign in the photo below says RABBITS. Unfortunately, it was damaged in a wind storm before I took the photo. I used a very light green paint and a thin paintbrush to paint the letters I had traced onto the boards. Once dry, I screwed cup hooks into the tops of the boards and eye hooks into the bottoms to make interchangeable signs. I finished just in time for the auction over the weekend, so we were open both Saturday and Sunday all day, albeit with few sales.


Where the open sign is (which is just red paint on posterboard), I stenciled BLUE SPRUCE FARM, since that is what we call our place. I left enough room for a website to be added under the name, but didn't have time to paint the letters. I think it turned out fairly well. Stay green!

Monday, August 9, 2010

Look at the size of those melons!

My posts seem to be getting longer and longer with more and more photos. While it's neat to look at photos, it's getting to be a bit extreme. I'm going to try to pare down my posts to just one topic with a few photos rather than try to give a play by play account of every day. It'll be easier for me, require less bandwith and photo loading time for you, and won't bore you with a wall of text.

So, today mom and I weeded the garden, or at least as much as we could in 100+ degree heat. We concentrated especially on the watermelon and cantaloupe vines to see if anything was actually growing under all those weeds. There was! Tiny little watermelons and cantaloupes were scattered about the vines. A few more weeks and we'll have a fridge full of melon goodness! Stay green!

It might be tiny now, but in a few weeks it'll be huge!


Saturday, August 7, 2010

We've been doing some neat things lately.

It's been a few days since the last post because I've had family in town from North Carolina. We've been doing all kinds of neat and interesting things, though, so it's definitely time for an update. First, the chickens became free-range early this week, cutting down on the amount of feed needed and giving the eggs a rich natural taste. They seem to enjoy it too.


Yesterday, we all went out back to the lower pasture to do some skeet shooting. The Winchester Defender (the shotgun with the pistol grip) really packs a punch. It'll buck back into you if you don't have a strong enough grip. Our results were rather dismal, though, and few skeet met their maker.

Cousin Tim shooting the Defender.
Me shooting the Defender.
Dad taking aim at the skeet. He had the best overall number of hits.
Even Aunt Julie got in on the action!
So did Cousin Ashley!

Yesterday morning, we all piled into my station wagon (utilizing all three seats, even the one in the cargo bay facing backwards) and drove over an hour to see a fort being built in Southern Illinois. The builder decided to construct a brand new colonial-era fort around his home about thirty years ago. Working with bought, found, and donated supplies, he has gradually built up a little over half of the walls so far, and a number of historic structures within the walls. Keep in mind while looking at the photos that this is actually the man's home.


The gatehouse is rather imposing with its heavy wooden doors and armaments.
One of the cannons guarding the front entrance.
The house at the center of it all.
One of the guard towers along the front wall.
The Livery, full of 19th century wagons.
Conestoga Wagon awaiting repair.
A wonderful cabin on the bank of the creek.
Sleeping arrangements are rather rough.
Laundry facilities are a bit basic too.
One of the two corner towers along the front wall.
A French Colonial post-on-sill dwelling.
A rail mounted cannon in the second-floor of the gatehouse.
View along the front wall from the gatehouse's second-floor.
Wouldn't want to be tossed in that jailhouse.
Who says that elaborate chandeliers have to consume a massive amount of electricity?

As you can see from the photos, just a handful of the hundreds I took, this was an awesome fort and a huge undertaking for just one man. He has done an amazing job, though, and is well prepared in case Indians attack.

Today, we got our exercise by loading hay bales onto a trailer in the field, then unloading them in the barn. Two horses consume one bale of hay everyday, so a minimum of 100 are needed for winter. We loaded 250, just in case.

Hay is first raked then baled by tractor.
Then we load the hay onto the trailer.
Ashley enthusiastically jumped in to help load bales.
We stack the trailer quite high.
Then we toss the bales up to be stacked up to the ceiling of the barn.

Anyone who tells you that tossing bales is easy is lying. It's hard work. Thank goodness it was cooler today with a slight breeze. Can you imagine doing this in 100 degree weather?

After tossing bales, we headed in to shower for dinner with the entire family to celebrate mom and Uncle Dale's birthdays. Good food, good company, but ran into problems with my grandfather's car, which had a dead battery. Leave it to the men in the family to fix the problem. We all stood around the front banging on the starter, jacking the car up, and finally charging it with a portable battery charger to get it started. Five guys ranging in age from 28 to 82 trying to get the car started while my 100-year-old great-grandmother waited inside to go home. After about half an hour, they were on their way. Crazy days, but tomorrow everything will be back to normal and the sidewalk project can resume. Stay green!

Tuesday, August 3, 2010

Composting Toilet

Yesterday evening, I finally started on the composting toilet project. I had downloaded instructions from Joseph Jenkins's The Humanure Handbook, but decided to alter them slightly to better suit out needs. Instead of using four legs in the corners to support the base, I built the base down to the floor. However, Jenkins's plans were definitely the best I could find and he is considered the foremost expert in humanure and composting toilets, so I highly recommend his book.

I bought two five gallon buckets with lids at Walmart yesterday, which will serve as the repository. We already had large sheets of 1-inch thick plywood that add additional strength to the toilet (Jenkins only calls for 3/4-inch plywood). To begin, you need at least two identical five gallon buckets with lids, a standard toilet seat, two hinges, enough screws to hold the toilet together, and 3/4 to 1 inch plywood. The buckets I used are 13 3/4 inches tall, so I needed the base of the toilet to be 12 1/4 inch tall. This allows the 1 inch thick hinged door to rest upon the base with 1/2 inches of the bucket remaining above the door.

You need two 12 1/4 x 18 inch boards, two 12 1/4 x 19 1/2 inch boards, one 3 x 18 inch board, and the 18 x 18 inch door. Making the boards 12 1/4 inches eliminates the need for four additional boards to use as legs, although you can still use them if you want to variate the height of the finished toilet. I used a circular saw to cut the plywood into the appropriate sizes, but you can use a table saw or saber saw as well.


In the 18 x 18 inch door, turn your bucket upside down and trace around the lip. Make sure the bucket is about 1 1/2 inches from one side rather than centered on the board. Use a drill to make a starter hole within the circle, then a saber saw to slowly cut along your line. Use sandpaper or an electric sander or grinder to trim the hole once you are finished cutting to ensure that it easily and loosely fits over your bucket.


Once your boards have been cut, you'll have the supplies shown above (dog not included). Notice how the hole in the door is not centered. Now, it's time to assemble the pieces so that you can use your composting toilet.

You'll probably need a second person helping to hold the boards in place while you drill in screws to secure them. The shorter 18 inch boards should be screwed into the edges of the longer 19 1/2 inch boards. Make sure your screws are long enough so that your toilet doesn't fall apart in the future while you're sitting on it. That wouldn't be good.


Once you've assembled the four sides, if your measurements were slightly off, just use your grinder or sander to take off the excess. You can also use it to slightly round the edges and remove any splinters.


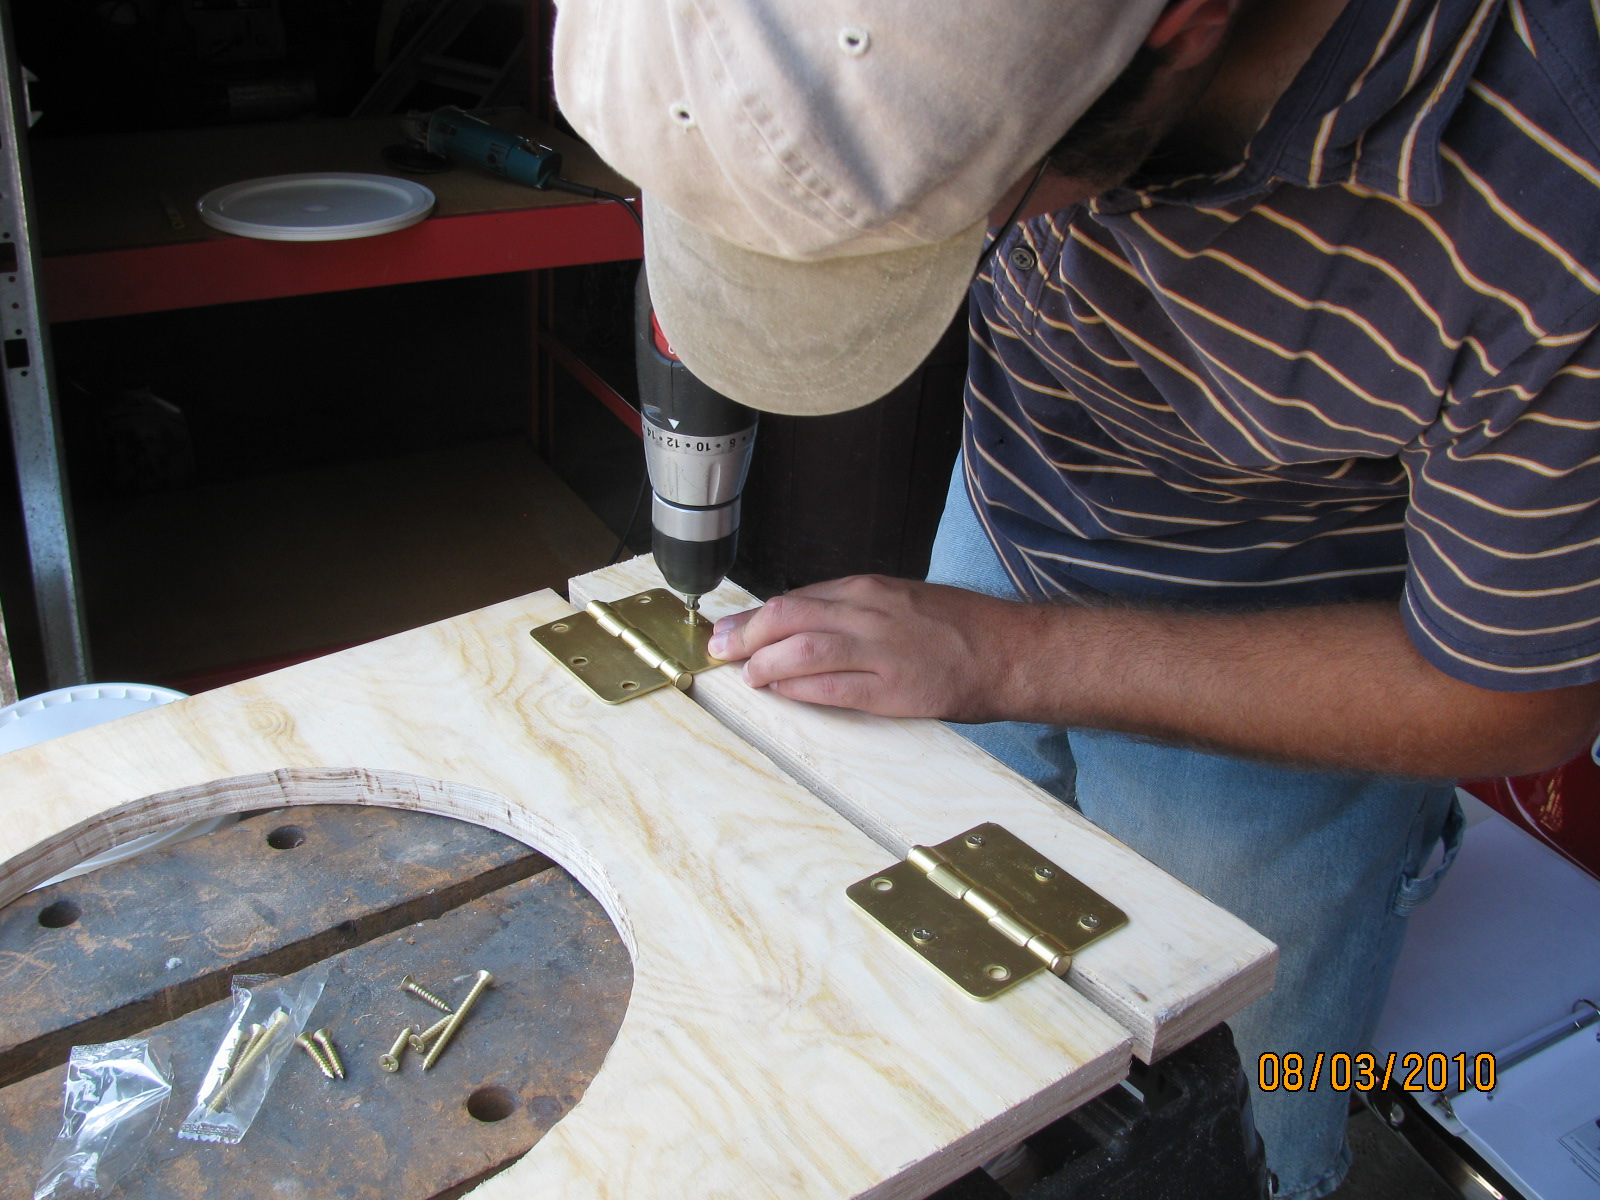
The next step is to assemble the top. You are building a hinged top toilet for easy access to the bucket inside, but only a small portion of the top will be connected securely to the base. This is the 3-inch strip that you prepared earlier. Take your door and position it so that the hole is farthest from the 3-inch strip. It's always best to secure your hinges to the strip first as it will be the part attached to the base. Once you have them secure, go back and attach the hinges to your door.


Now place your door on the base and line it and the strip up so that it is square. Definitely ensure that the strip is lined up correctly as you will need to secure it to the base. Use plenty of screws as this strip will get a lot of exercise whenever someone sits on the toilet or you lift the door to remove or replace the bucket.


Your base is now complete! Only thing left to do is securing the toilet seat. Place a bucket in the toilet as you normally would. 1/2 inches of it should clear the top of the door. Place the toilet seat on top, lining it up carefully so that the opening in the toilet seat matches the bucket's opening. Once lined up, you can either mark where to drill the holes for the bolts or drill through the fasteners into the door. I chose the latter simply because it was easier (I managed to drill through the fasteners without damaging the plastic). The bolts on most modern toilet seats are plastic, so make sure your holes are big enough around that you won't have to force the bolt.


Put the toilet seat back if you removed it, and put the bolts through the fasteners and holes. In order to screw on the nuts (also plastic), you'll probably have to lift the door, so you'll need a second set of hands again, in this case my cousin, Tim.


Once you have the nuts tightened and the toilet seat securely in place, you can paint or stain the toilet as you want to extend its life and make it more aesthetically pleasing. Search online for ideas, people do some really neat things with their composting toilets to blend them in with their surroundings or beautify them. For now, mine is staying this way until the humidity drops enough to paint it with shower paint, making it waterproof.


Don't forget to place a bucket full of an organic cover next to the toilet. You can use sawdust, peat moss, leaf mould, or even grass clippings. Simply start off with a layer of the organic cover material in the bottom of the bucket. After every use, completely cover the waste with another layer of cover material. The cover material prevents odors, absorbs excess moisture, and balances the carbon-nitrogen ratio. Always remember to cover after use, the toilet will not remain sanitary if you forget.

I don't have a designated compost area for the humanure yet, but will take pics once I build it. Don't mix your humanure with your other compost. Humanure takes longer before it can be safely used, especially in underdeveloped regions where pathogens are more common. For use in the US, common rule of thumb is to let it compost for a year before use. In underdeveloped regions, allow it two years before use. There is an entire chapter in Jenkins's Humanure Handbook that details composting. I suggest reading it before you empty your first bucket.

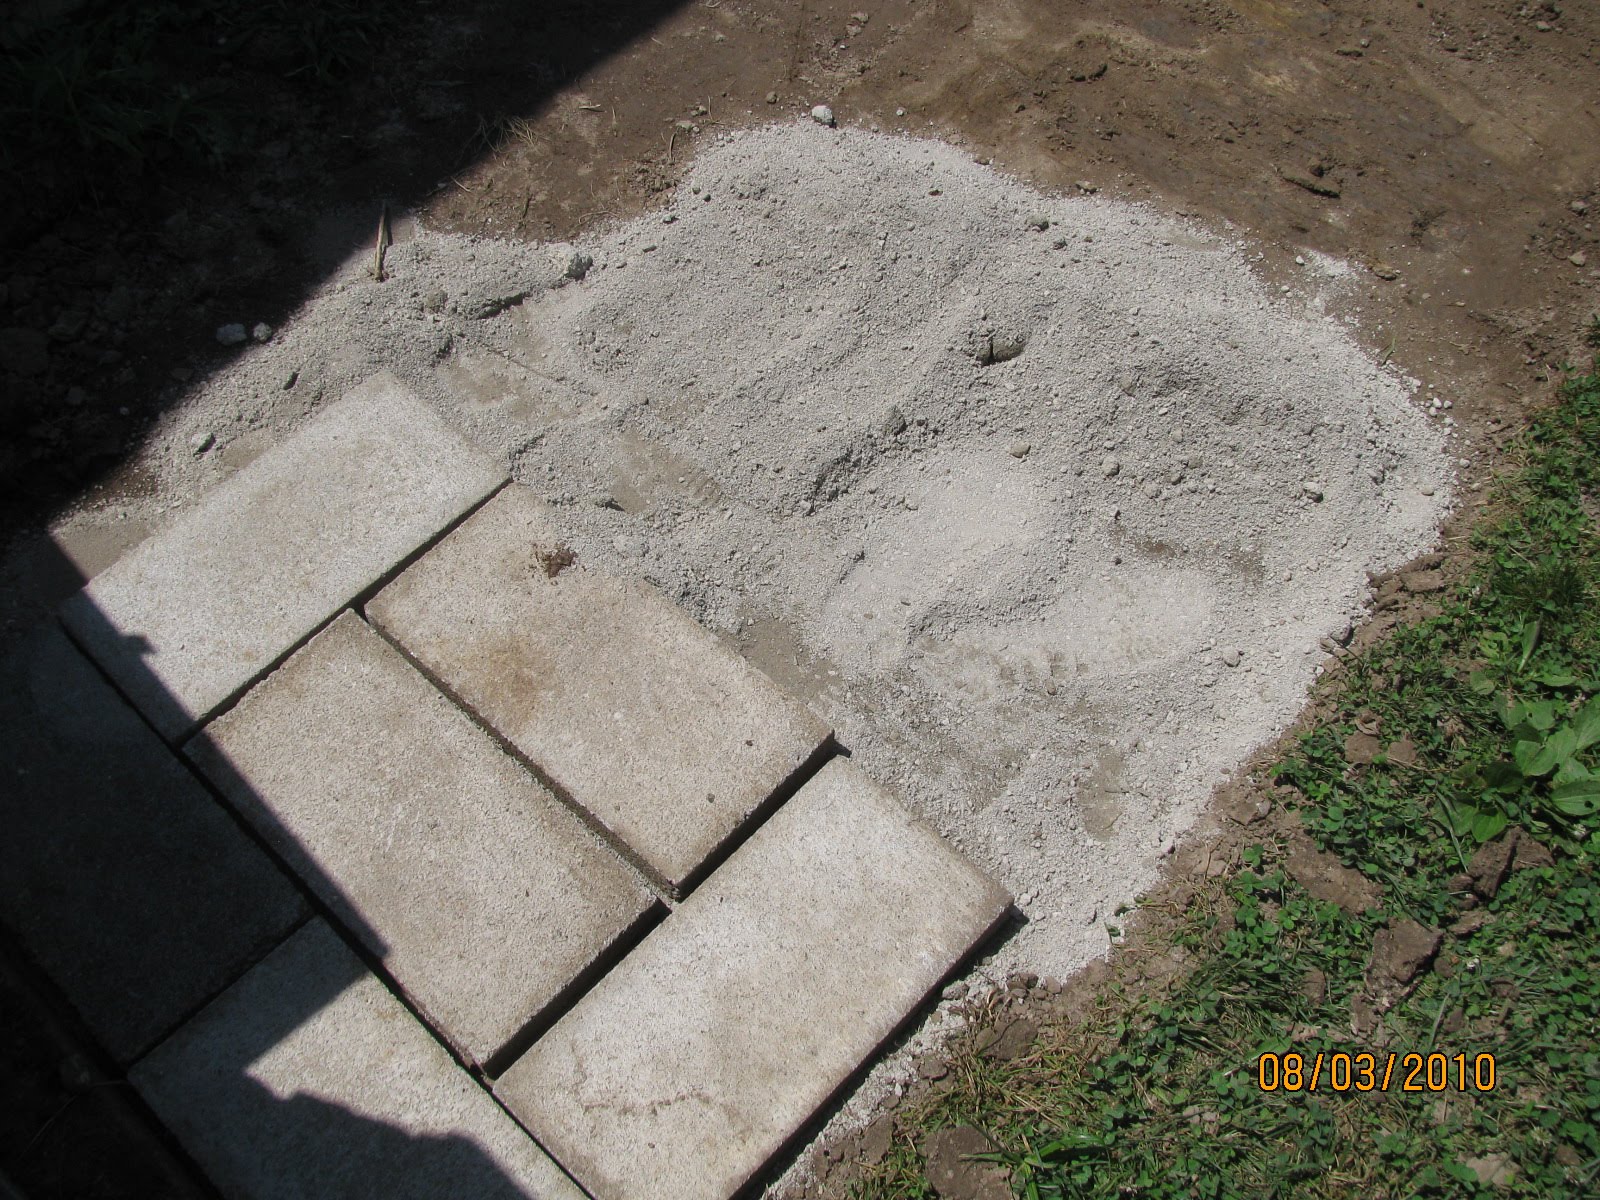
With the composting toilet done, I went to work on leveling the sidewalk area and pouring lime as a footing for the pavers. As you can see, I laid a few pavers down to see how it would do with the lime. There are a few areas I need to dig out deeper and a few areas that need to be raised still, but they look good in place.


I didn't get far before the heat just became too much to handle any longer. I finally stopped when the heat index hit 110 degrees and still rising. It's forecasted to hit 125 before the day ends. No way I can work out in the sun in that kind of heat. Tomorrow will be brutally hot too, but I'll get a few hours of work done in the morning while the sidewalk is in the shade of the building.


Stay green!

Sunday, August 1, 2010

Sod Off!

Oh my! Phase three of the sidewalk project is finished, but we are all stiff and sore to pay for it. Nothing like getting up around 6am to rent a sod cutter then working straight through to 6pm cutting and removing sod. Hard work. However, it looks good and will only take a little finishing work to get where we need it before laying the lime and pavers.
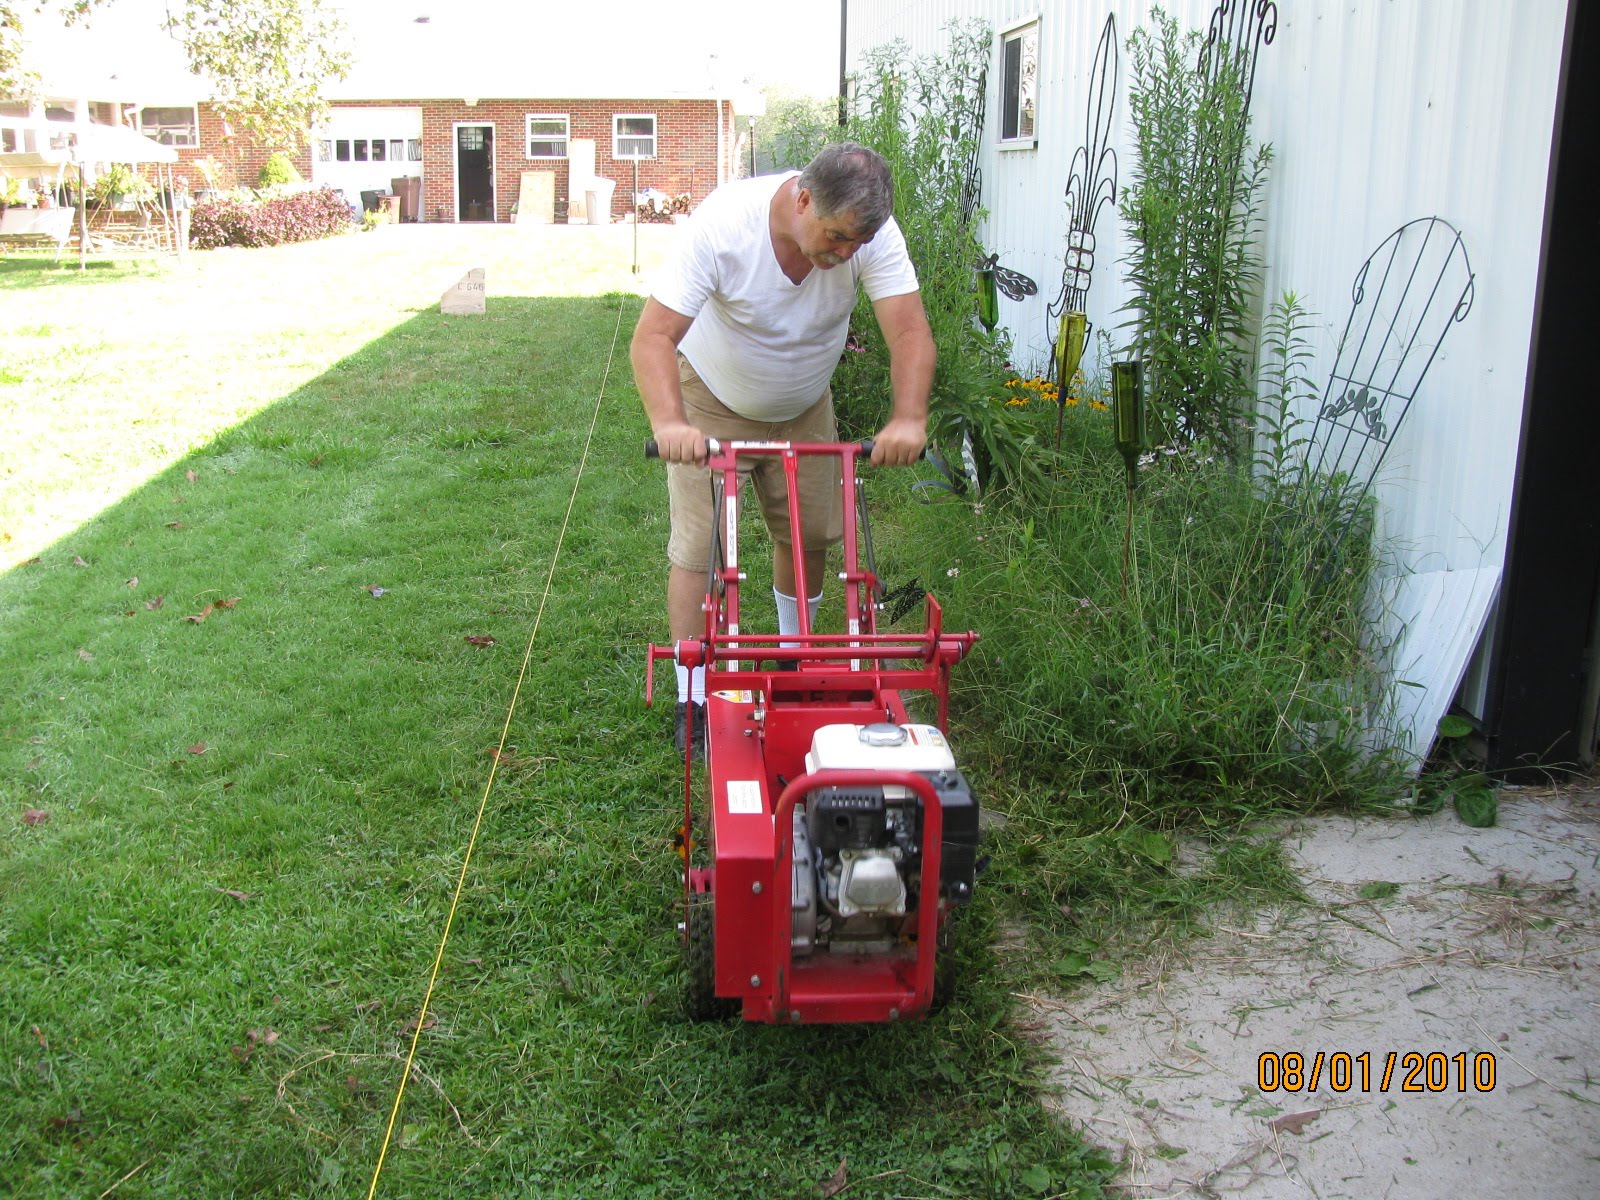
Dad using the sod cutter

Chopping the sod into manageable chunks and shoveling into cart for removal

Hauling away a cart of sod

Unbelievably, at one time, the chicken yard was completely grassy

The sod free path for the sidewalk

Along with removing the sod where the sidewalk will go, dad used the sod cutter in front of the potting shed since mom wants to put a flower bed in there. He also used it by the back patio to extend it further into the yard. You can never have enough patio space. All the sod was carted off to the chicken yard to fill low areas that become swamps (incredibly odorific swamps) anytime it looks like it might rain. We still have to finish along the edges and remove some dirt nearest the chicken yard, but for the most part, phase three is done!

While dad and I worked on the sidewalk project, mom decided to trim one of the bushes that is the bane of my existence when mowing. The branches enjoy slapping me in the face as I mow around it. Not anymore though, as she pruned it back to manageable size. The chickens will miss their hiding spot, though, as they like to eat the worms and bugs that live under the branches when they are free range.


My cousin, Tim, is arriving for a visit tonight, so expect fewer updates this week, although I will be enlisting his help in building the composting toilet tomorrow. With additional guests, we definitely need another toilet. Stay green!